Site Sponsors:

Advertise
your
Ko-fi and
Etsy shops
Here:

Tuesday, July 25, 2017

Embellished Altered Keys

Embellished Altered Keys

Posted by Kim Newberg - September 27, 2016 2:09 PM
Embellished Altered Keys
This Tutorial is about altering ordinary discarded house and car keys
These Embellished Altered Keys are fabulous to use for your scrapbook pages, altered books, collages and mixed media projects.
Lovely embellishments to add on book and journal covers, even as new jewelry pieces!
Dig through your junk drawer, your jewelry boxes and visit your local thrift shops and garage sales for lovely baubles and bits to add to your key creations. This tutorial makes a fabulous workshop or class and a fabulous fun day with the gal pals making these keys.
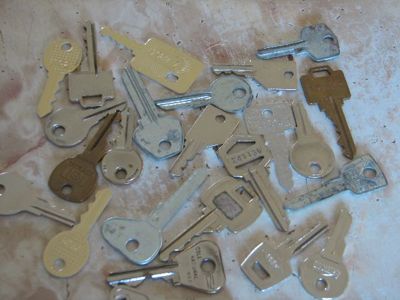
I had been saving this pile of keys for a while now with the idea that someday, somehow, I was going to alter them into something crafty. Well, today was "someday" actually the last couple of days. I was having so much fun I kept making more.
IMG_3262

Basic Supplies:
  • Black and gold acrylic paints
  • water based varnish clear
  • sponge brush and paint brush
  • wax paper
  • Goop glue
  • Jewelry making supplies including: jump rings, wire, head pins, eye pins etc.
  • Good jewelry needle nose pliers (even 2 pair work well if you have)
  • Filigree embellishments all shapes & sizes
  • assorted cabochons, buttons, broken jewelry, beads, chain and any other decorations you desire.
Getting Started:
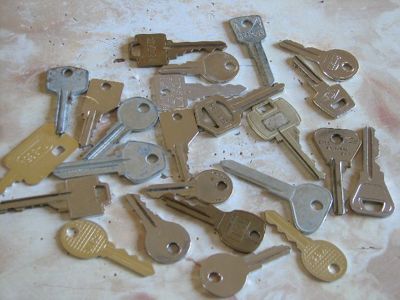
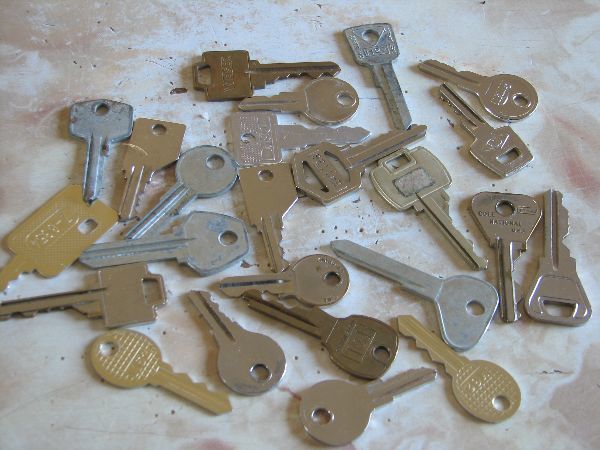
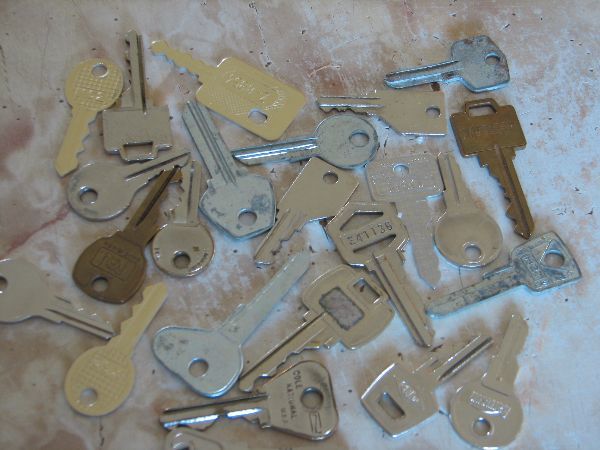
Start with a collection of ugly old car and house keys.
IMG_3263

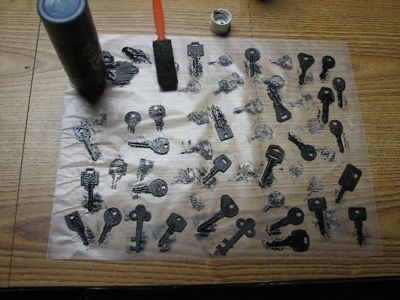
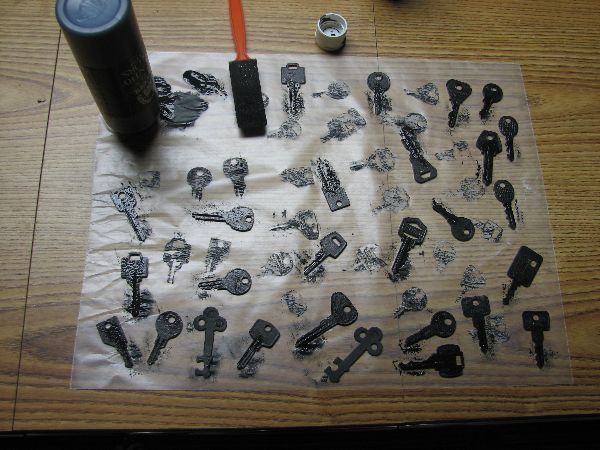
Next get out your black paint, using a sponge brush paint the keys both sides. I set them down on wax paper as I was working on them. Don't be too fussy about making them perfect because the paint doesn't stick perfectly. Besides, you will be adding additional colors that will hide any flaws.
IMG_3265

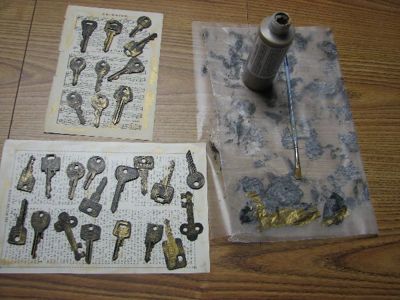
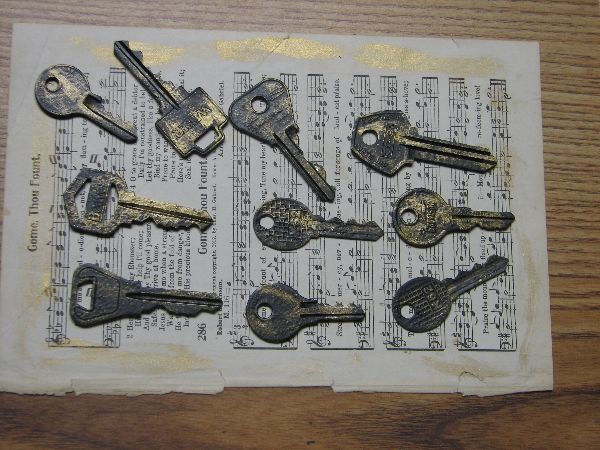
Next, using the gold paint, dry brush very lightly a little bit of gold on each key, allowing lots of the original black paint to show through. This just gives a very vintage look.
Variations: Try painting with patina colors, for an antique copper look, or even rusting your keys for a couple week for a natural weathered look.
IMG_3266

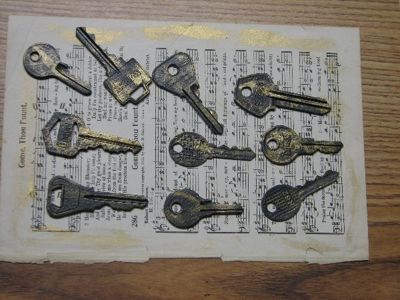
Yep, I know, they still look like old house and car keys but they are getting better right?
Now give a very light coat of varnish to protect the paint from chipping.
IMG_3268

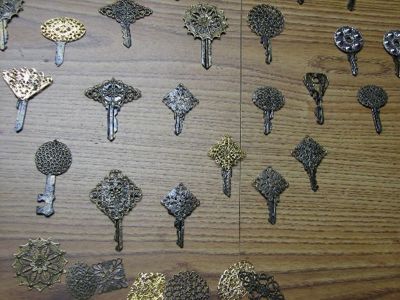
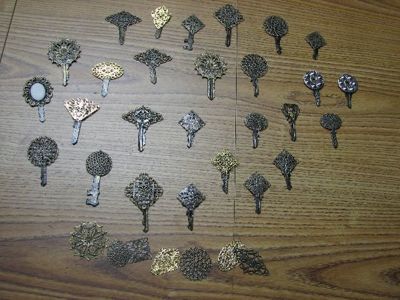
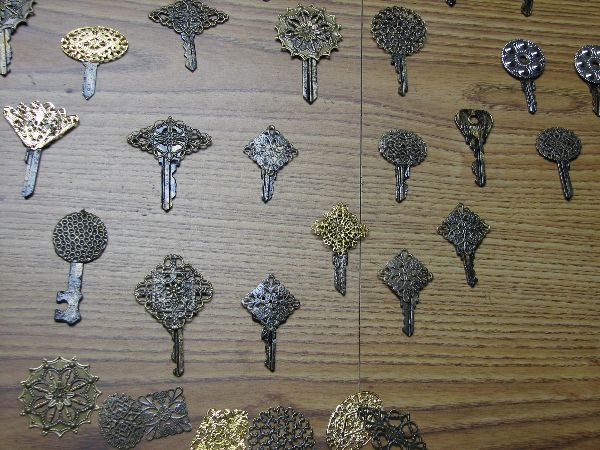
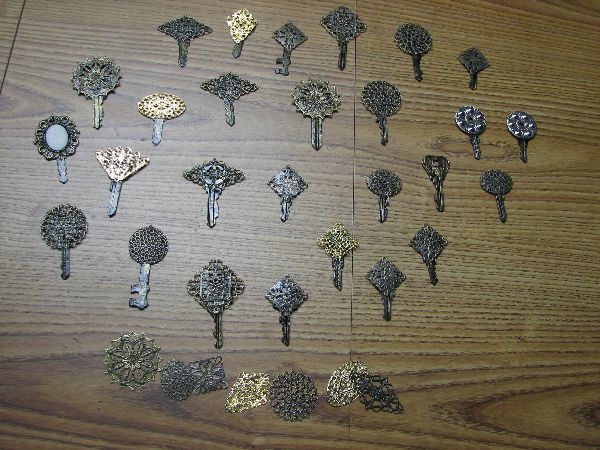
Now go through your stash of Filigree embellishments to decide which style fits best with each key. Be sure to try them different ways too, I loved the diamond shape when I turned it the other way.
IMG_3269

I changed my mind several times before I actually glued them down. Using Goop Glue, glue the filigree pieces to the keys. covering the old key face as you desire.
IMG_3270

Next is the embellishing of your keys. It is impossible to give you actual instructions because it all depends on how fancy you want to get or what findings are available to you. But if you are resourceful, you will probably have a multitude of great items very close at hand. I used buttons (break off the shanks) odd earrings, cabochons, gems, beads, chain and more.
Be sure to glue these items on using the Goop glue, this way you know they wont fall off.
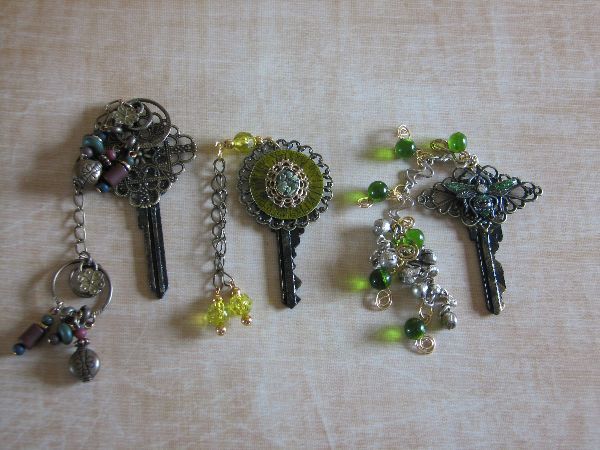
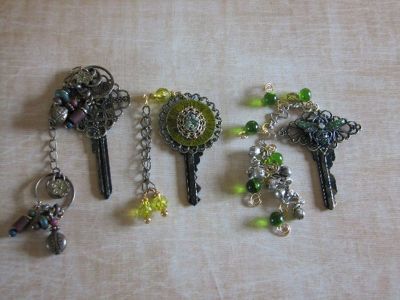
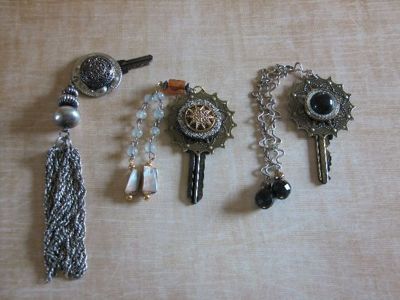
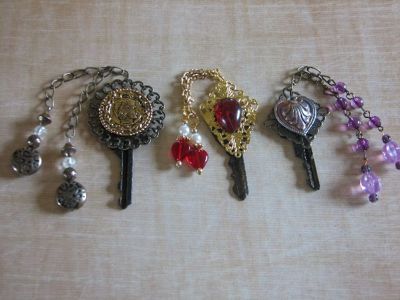
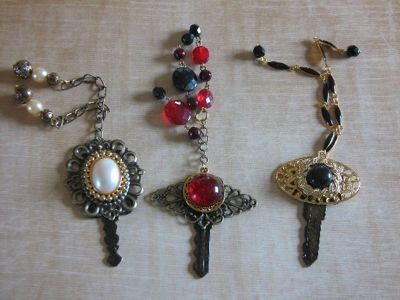
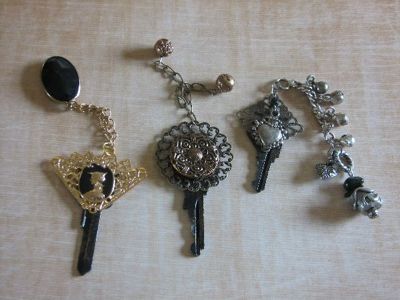
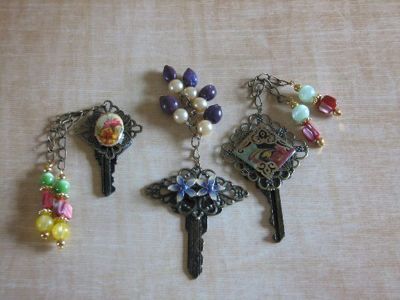
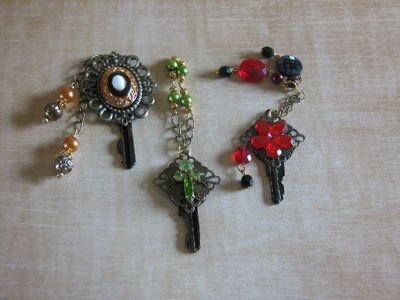
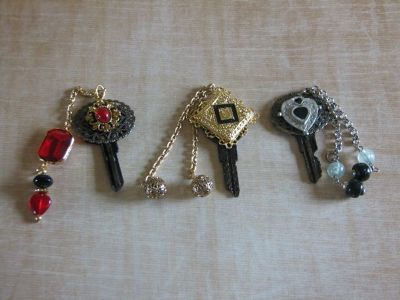
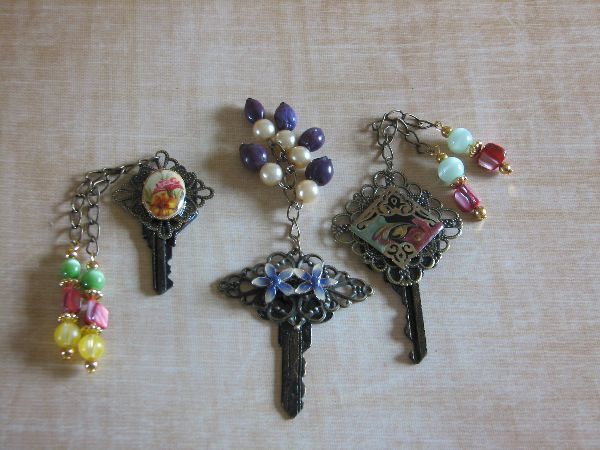
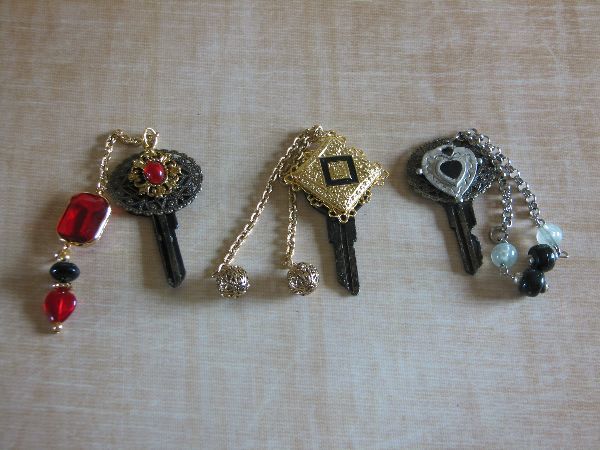
Below are pictures of finished keys that I made. I will describe what I used for each key (I think I actually remember)
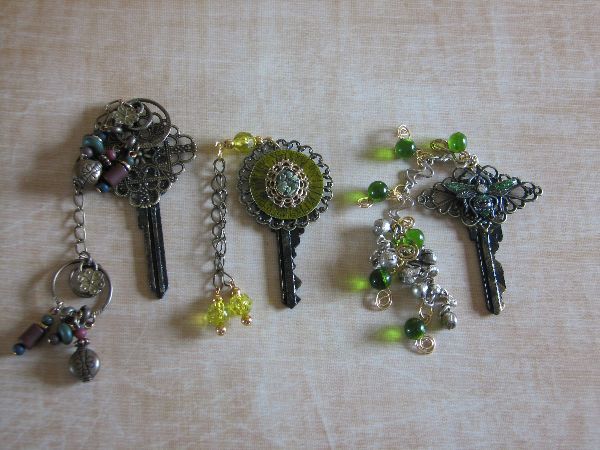
Key 1 a pair of earrings, one attached to the key, the other dangles from a chain.
Key 2 A watch face with a cabochon and matching beads dangle from a chain.
Key 3 A butterfly hair barrette with matching beads and chain.
IMG_3276 small

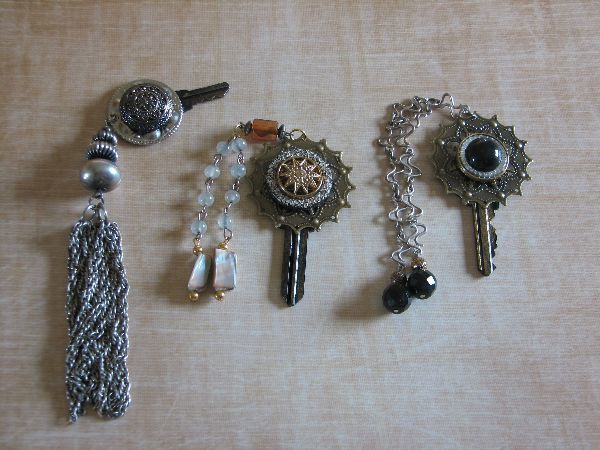
Key 4 a Button and a chain tassle from a necklace.
Key 5 A button, beads and chain
Key 6 Another button (too easy) and more beads and chain
IMG_3278

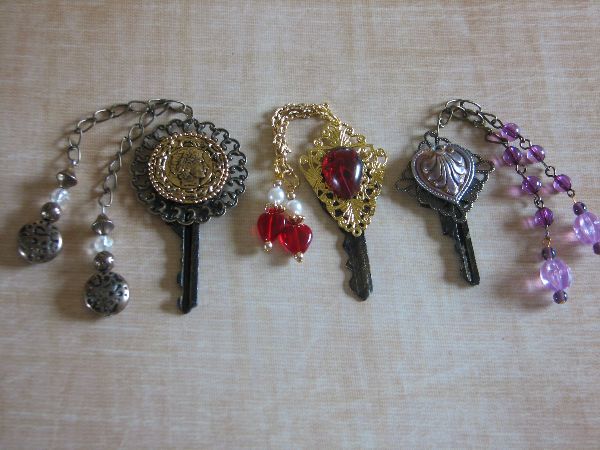
Key 7 Coin trinket with beads and chain
Key 8 Red Glass Gem beads chain
Key 9 Heart shaped earring and more beads and chain
IMG_3279

Key 10 Button
Key 11 Pendant with glass bead
Key 12 Button
IMG_3280

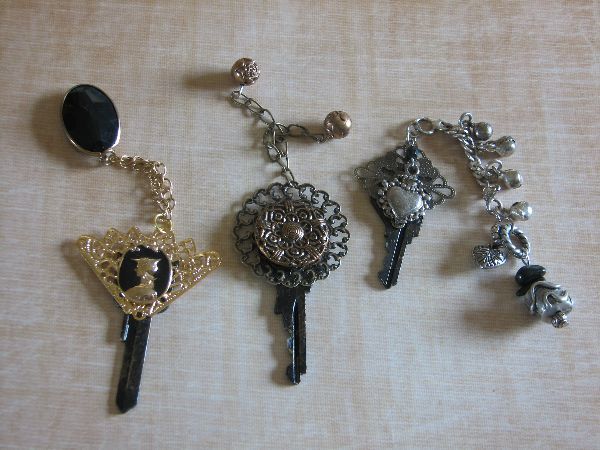
These I used some broken necklaces chain and beads
Key 13 Earring
Key 14 Button
Key 15 Earring
IMG_3281

Start asking your friends for all their old jewelery, visit your local thrift shops and garage sales.
Key 16 Cabochon
Key 17 Hair barrette
Key 18 Earring
IMG_3282

I really lucked out in my stash of beads to find matching colors, but I do have a huge stash to work with. keep in mind when you are making these keys, what you want to add and match with the embellishments.
Key 19 Button (it actually fit right into the frame)
Key 20 Earring ( I love this green one)
Key 21 Gem ( a plastic dollar store find)
IMG_3283

Key 22 Pendant
Key 23 Button
Key 24 Another Earring
IMG_3284

So there you have it! Hopefully you will be inspired to create your own embellished keys. Please let me know if you make any yourself, I would love to see your creations.
Kim

ATC ACEO ART CARD TUTORIAL and History

ATC ACEO ART CARD TUTORIAL and History

Posted by Kim Newberg - September 27, 2016 10:07 AM
ATC ACEO ART CARD TUTORIAL
This tutorial is only my personal opinion of how I make my art cards. You may follow exact if you like or take it to a different level that you are comfortable with.
My supplies are based on what I have on hand and are often recycled materials and though I do endorse a couple of products that I love working with, again it is only my personal choice and I encourage you to decide what works best for you.
Embellishments and finishing are again a personal choice and each person will choose items and ideas based on what is available to them and what they like to work with.
This tutorial is copyright 2008 Kim Newberg and may not be published elsewhere in part or whole without my written permission and consent.
History of Art Cards ATC ACEO Artist Trading Cards
History of ACEO ATC and Art Cards
ATC=Artist Trading Card
Artist Trading Cards were originally art cards that were traded world wide only among artists. Little works of art in a standardized size of 2.5" x 3.5" that you could not purchase, trade only.
Like sports cards and other trading cards, there came a point that people wanted to collect and purchase cards especially those that were not artists themselves or those that could not find suitable trading partners.
Many started selling their art cards on eBay and other selling sites using the acronym ATC.
Many members of the group were outraged and even today, some still feel that the acronym ATC should not be used in the title or description when selling your ATC art creations.
ATC is an acronym of the words artist trading cards and like with all other trading cards in my honest opinion, anyone should have the right to buy, sell, or trade their art cards as they choose.
ACEO=Art Card Editions and Originals
ACEO is a group originally created on eBay for buyers, sellers and collectors of art cards. They do follow the guidelines of the trading card size of 2.5 x 3.5" however I believe they accept all designs and sizes of art in their group. As of today their group has expanded to a huge membership with additional spin off groups all related to art card creations.
Art Cards
Since the trend of the ATC many different groups have been created to host a variety of sizes of art cards. There are post card art , 2" x 2", 4" x 4", inchies, miniature, slide art etc, it is endless.
If you do a search on ebay , etsy, google, yahoo, flickr, and ning you will find many art card groups that offer both public and private membership from elite, specialized, theme based etc.
My personal experience:
I started to create art cards for trading back in 2003. I made some fabulous trades with incredible artists world wide and then I made some "not so fabulous" trades as well.
I often found that many artists were unreachable for trade as so many wanted to trade with them, it was almost impossible to get some trades. Then I found that some of the quality of items I had traded for were not necessarily the standard I had set for myself.
In my frustration to collect these wonderful delights, I found sellers and buyers and groups on eBay.
This allowed me to sell my art cards and purchase the ones that I wanted, and paying the price I was willing to pay.
My art card collection from other artists is well over 400 items since my last count.
When I first started making art cards, I didn't keep track of them at all. I even deleted the images after I sold or traded my pieces. So some of my original art is out there with only my name and date on the back.
Finally in 2005 I started to serial number my art, and keep better track of both where it went and what I made.
When I look back on some of my earlier pieces I can definitely see changes in style, humour and medium. I can even relate to things going on in my personal life that were reflected in my art.
I have sold my ATC/ACEO art cards for as little as $1.99 (darn ebay) and as high as $29.50 (whooo hoo eBay) however I have seen art cards sell for as much as 400.00 for one card and maybe even more.

Basic Supplies Needed

  • Cereal/chipboard/matte board pre-cut to 3.5 x 2.5
  • Paper glue sticks, my favorite is UHU glue
  • Assorted background and base papers.
  • Images and paper bits for creating your card.
  • Ink pads, or water base stain, or instant coffee granules,or paints,brushes,sponges etc.
  • Embellishments IE buttons, fibres, ribbon, coins, parts and pieces trinkets and trash
  • Glue for gluing your embellishments.
  • A guillotine style cutter works great for cutting chipboard but a good sharp pair of scissors will do as well.

Tutorial Part One

ATC/ACEO art cards
Art card base:
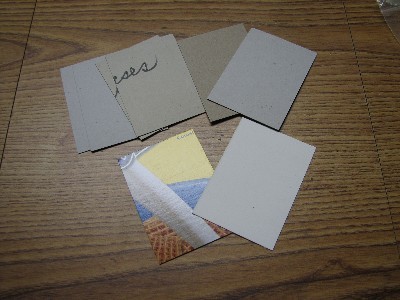
I use a combination of/or matte board, cereal boxes, chipboard and almost always they are recycled items from other things.
Using a good cutter or sharp scissors, cut the base to the standard trading card size of 2.5" x 3.5"
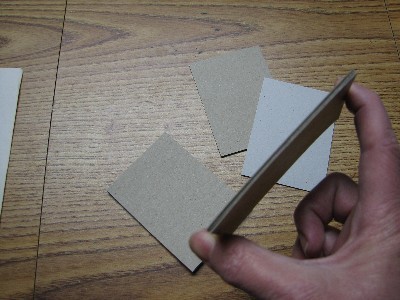
Then depending on the thickness of the card board, I will often glue 2 or 3 pieces together to create a thicker card. My card test is to hold the cardboard between my index finger and thumb to see if I can bend the card. I like that the card is sturdy and doesn't bend easy.
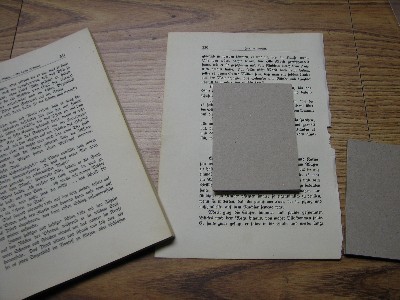
Then I cover the cardboard with what I call a base paper. This may or may not be the background to my card, often it is only the paper I use to hold or encase the cardboard base. I use recycled paper, usually book or magazine pages that would end up in a landfill.

Often I make bases in quantities knowing that I will probably completely cover them anyway.
In this case I used a page from a vintage German book because I knew I was going to let a little bit show.
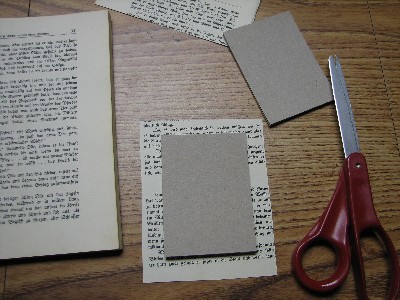
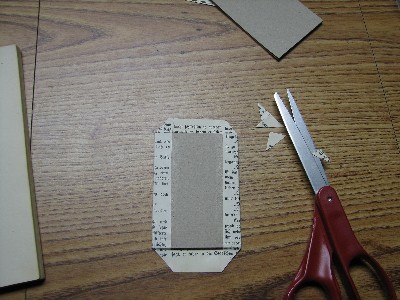
Next, trim the paper to approx .5" (half inch) all around.
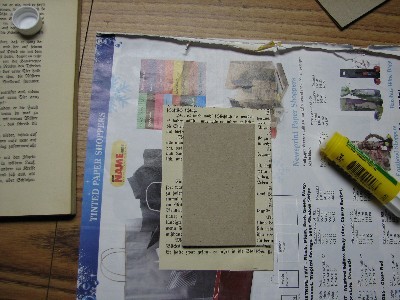
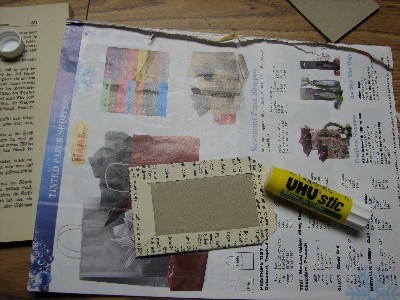
I use an old magazine or catalog to do my gluing. staining, or painting. As the page gets messed up and sticky I just tear it off and have a fresh surface to work on.
First glue the paper down to the cardboard, then flip over and glue the long edges of the paper to the cardboard.

Then I trim the corners on the 4 sides and glue the flaps down.

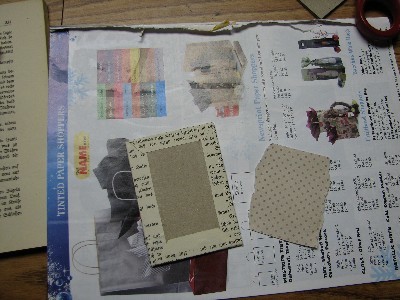
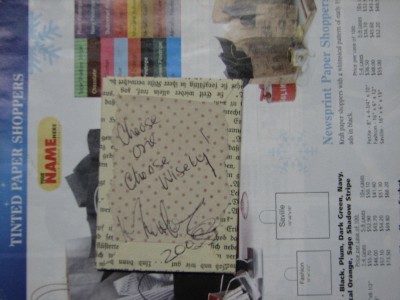
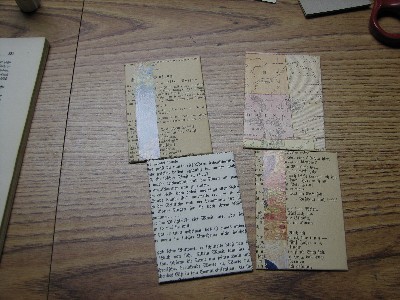
This is the backside of the card and I like to finish the back. So I used a small piece of design paper left over from another project. This could be any kind of paper you desire. I like to sign, date and title my cards on the back so usually I use a light colored background.

As you can see, I use many types of papers to create the card bases and then sometimes I will add little scraps on the front and these are ready to create with.

Part 2 Card Design/Theme

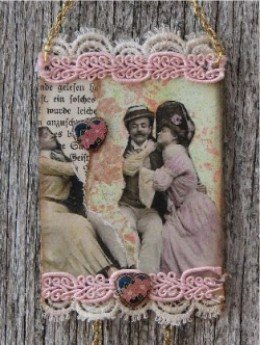
This card creation is based on the theme: One and the Title of my card is: Choose one! Choose wisely.

This card creation is based on the theme: One
and the Title of my card is: Choose one! Choose wisely.
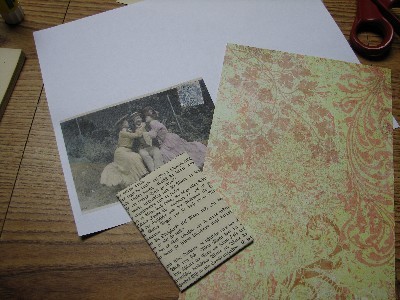
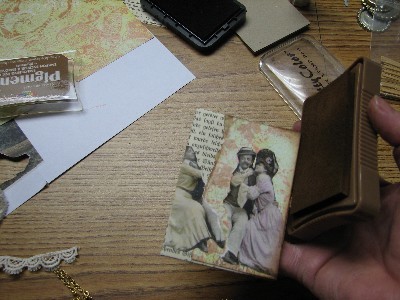
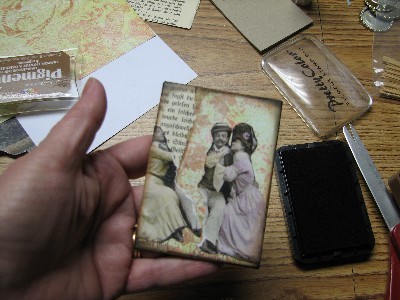
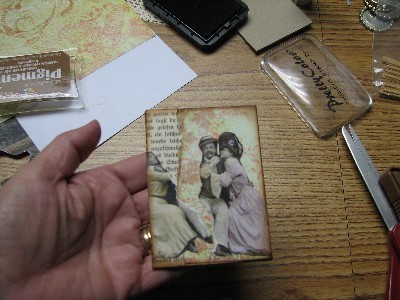
I picked the image of this gentleman with 2 women. Then I chose a background paper I wanted to use that complimented the image.
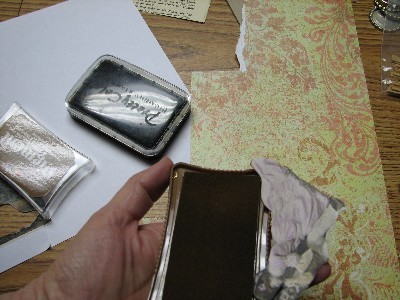
Then I cut out my image and inked the edges by lightly running the paper along the ink sponge. This helps to eliminate those white edges from showing, and gives the image a little more depth on the base.
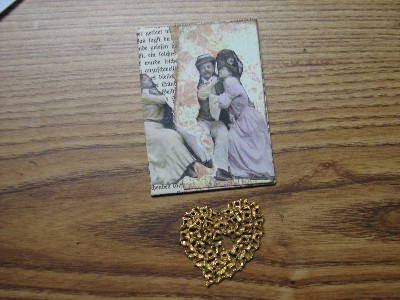
I then tore the image in half to represent his choice, added the background papers and glued to the card base. How cool that I had this broken jewelery piece shaped like a heart in my stash of supplies. It looks like he chose the wrong "one" (girl) to me.
Then I ink stained the edges of the card front and backside with a brown ink stain, followed by the black ink stain.
Again this gives more depth and ages the card.


Ink staining or distressing can be done using ink pads, mixing instant coffee granules with a little bit of water, or by dry brush painting.
Now to embellish:
I started with a little bit of ecru lace but I know I won't stop there.
I use a hot glue gun to glue the lace and any other type of fabric embellishments.
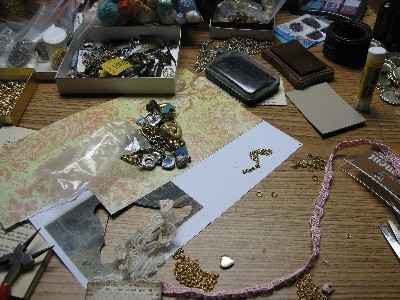
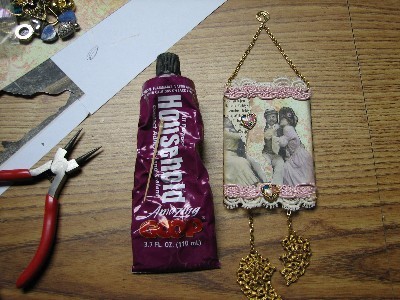
Haha here is a pic of my very messy table top. As you can see I really am only working in about 1 square foot. This table is approx 4' x 6' so that's pretty bad.
Maybe next week I will spend the day cleaning my studio and show you the pics.
But don't count on it or hold your breath. LOL
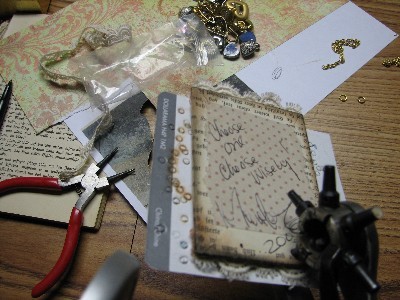
Then I punched 4 holes into the card at the bottom and top. The bottom is for hanging my broken heart pieces. The top is for a chain hanger I will be adding to the card.

I have a wonderful tool called a Cropadial that hole punches and does a variety of eyelets and rivets but ummm I honestly can't find it. So I was forced to go back to an old leather punch tool but it works and worked for many years before the Cropadial.
I probably should have hole punched before I glued the lace on by I am "winging it" making this card so that is why I am doing it now.
After hole punching, I added the jump rings to hang the bits of chain both for the hanger and dangles. Another piece of wire was coiled to make a finishing top for the hanger.

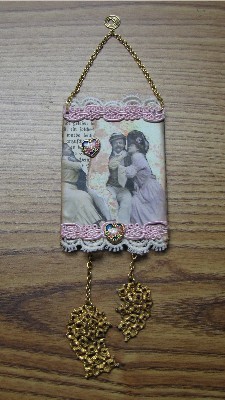
I still thought it was a little bare so I added the pink trim over the lace. Then I found these pretty floral metal hearts to further embellish the card. These were glued on with goop glue. I use Goop or E6000 for gluing metal, glass, plastic etc. This glue takes a couple hours to fully dry tho the item can be moved around after about 20 minutes and the glued items won't fall off.
And there you have it......my finished art card titled: Choose One, Choose wisely!
If I have inspired you in anyway, and if you have created any art because of this tutorial, I would love to hear from you!

Row House Art Card Display Holder Tutorial by Kim Newberg

Row House Art Card Display Holder Tutorial by Kim Newberg

Posted by Kim Newberg - September 26, 2016 6:53 PM
HI Everyone,
Well finally I had some time to sit down and play a little. Lately that doesn't seem to happen much at all so it was extra fun and the results were fast and for a change it was a project that I get to keep for myself.
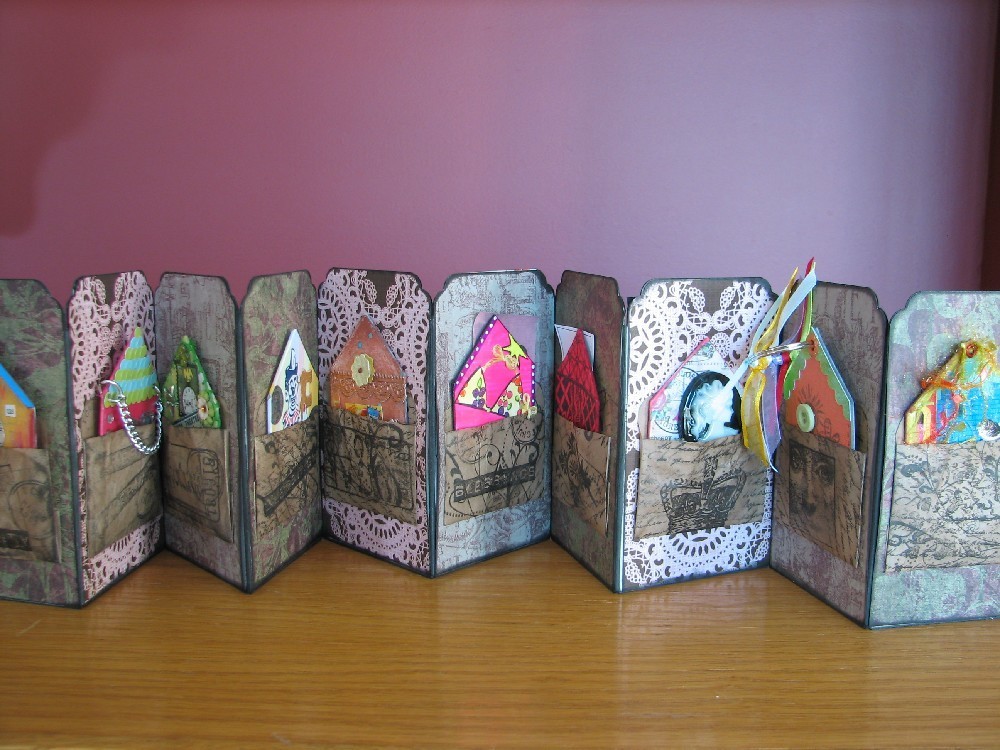
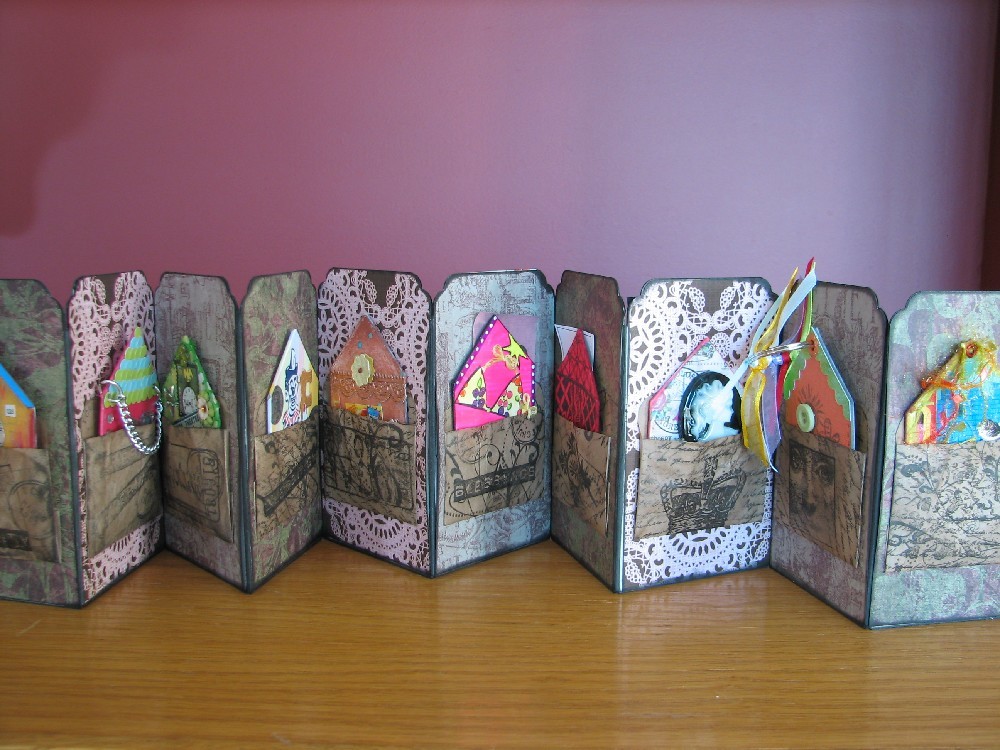
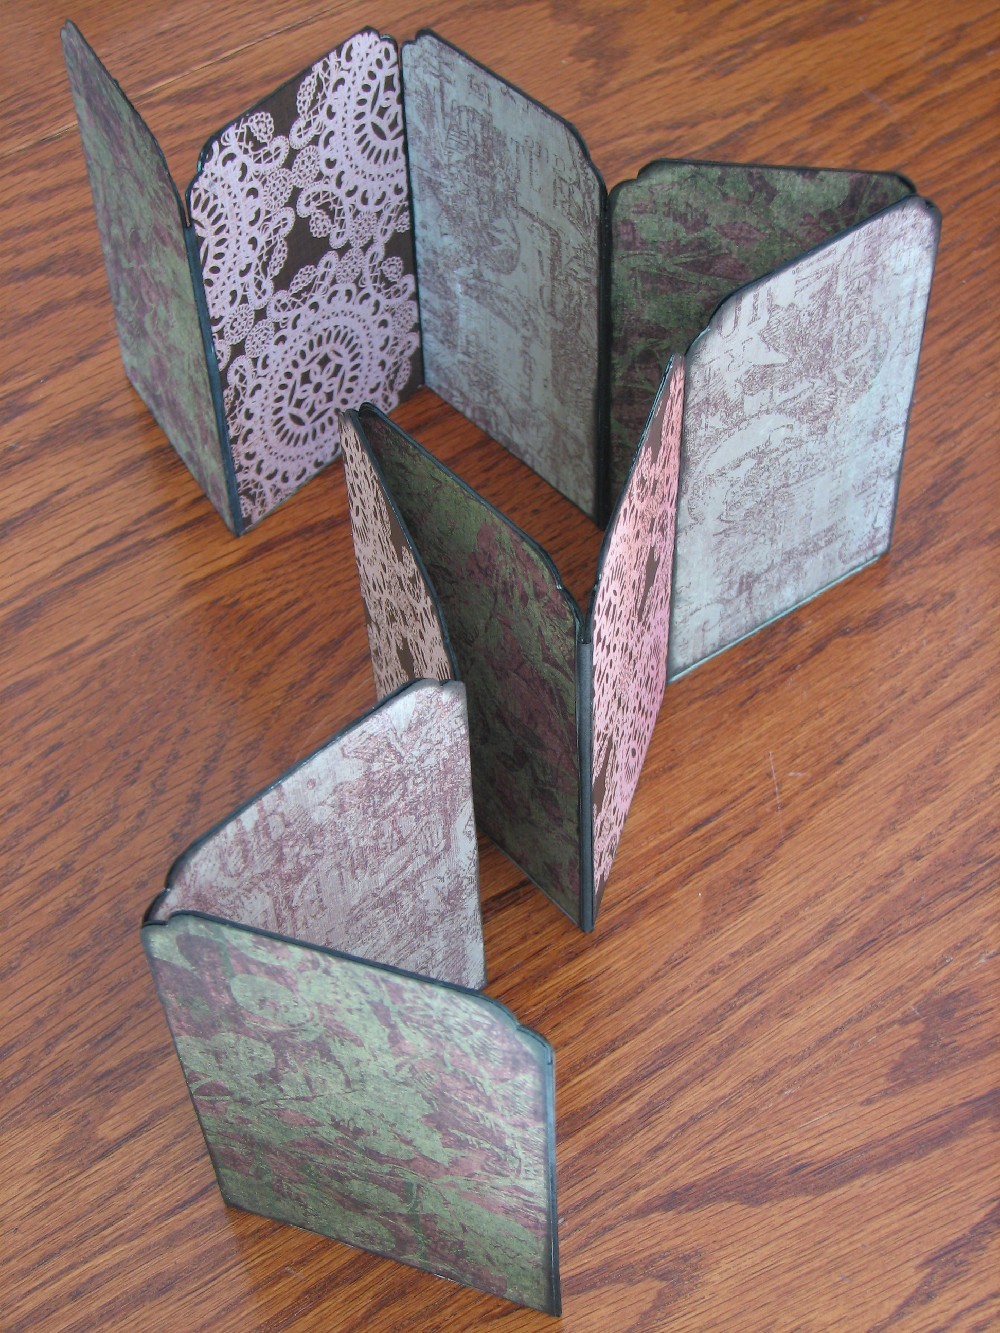
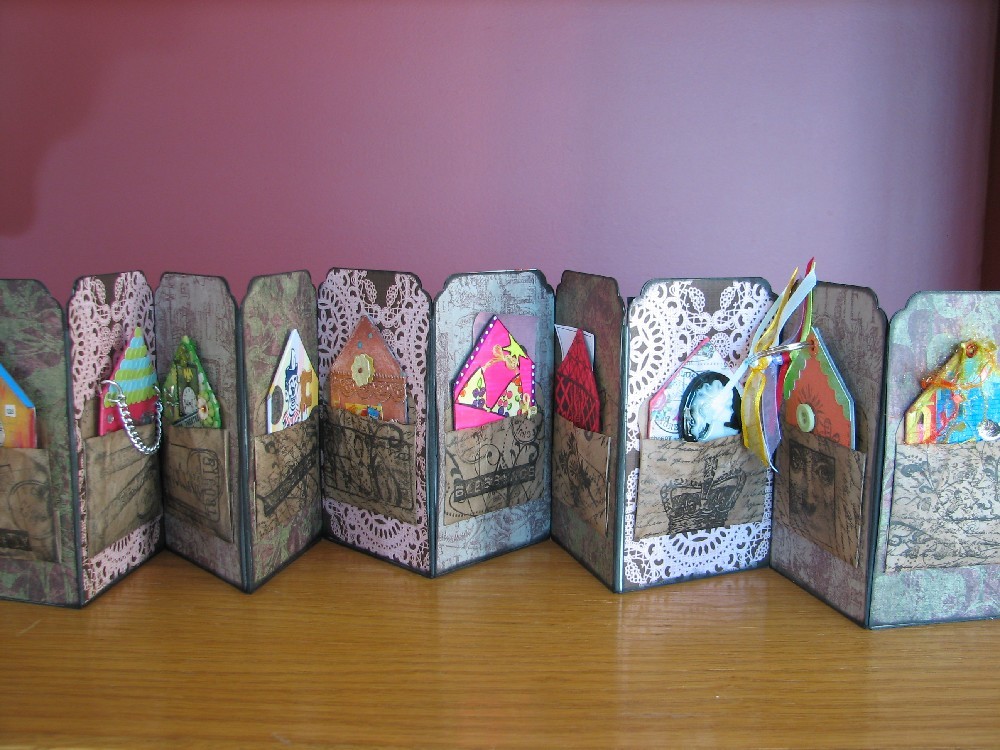
Here are some pictures of the finished Row House Holder. I am sure some of you are familiar with doing other projects in an accordion style but for those that are new to this art form, this is a great way to get started.

I haven't given all the details but I have created step by step pictures and I will give you some basic instructions on how I created it.
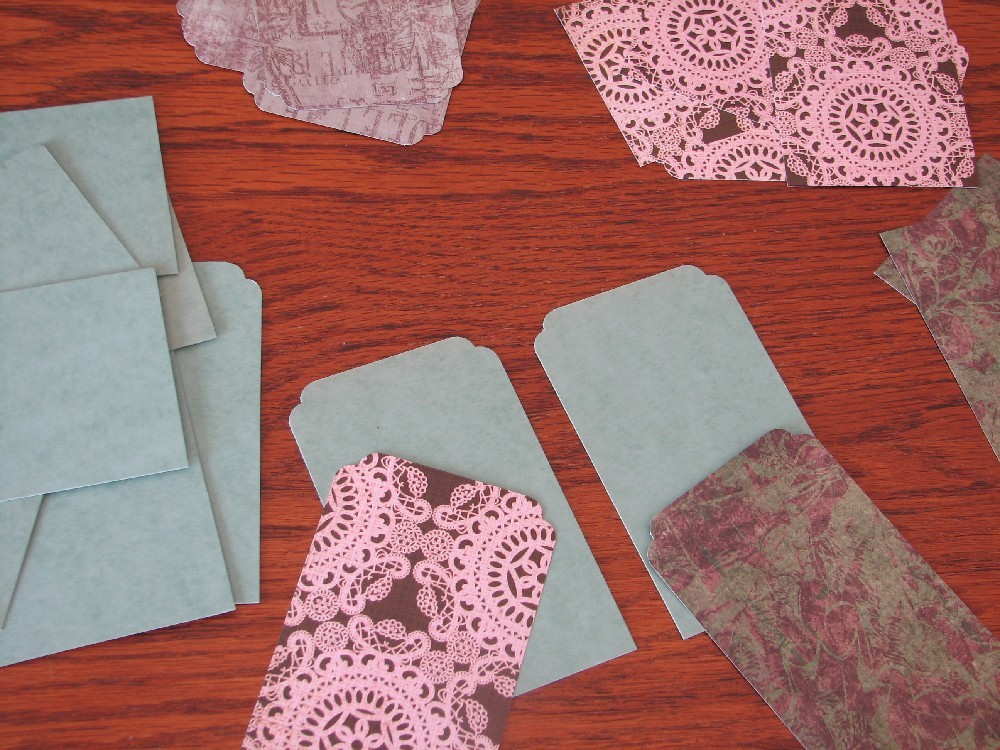
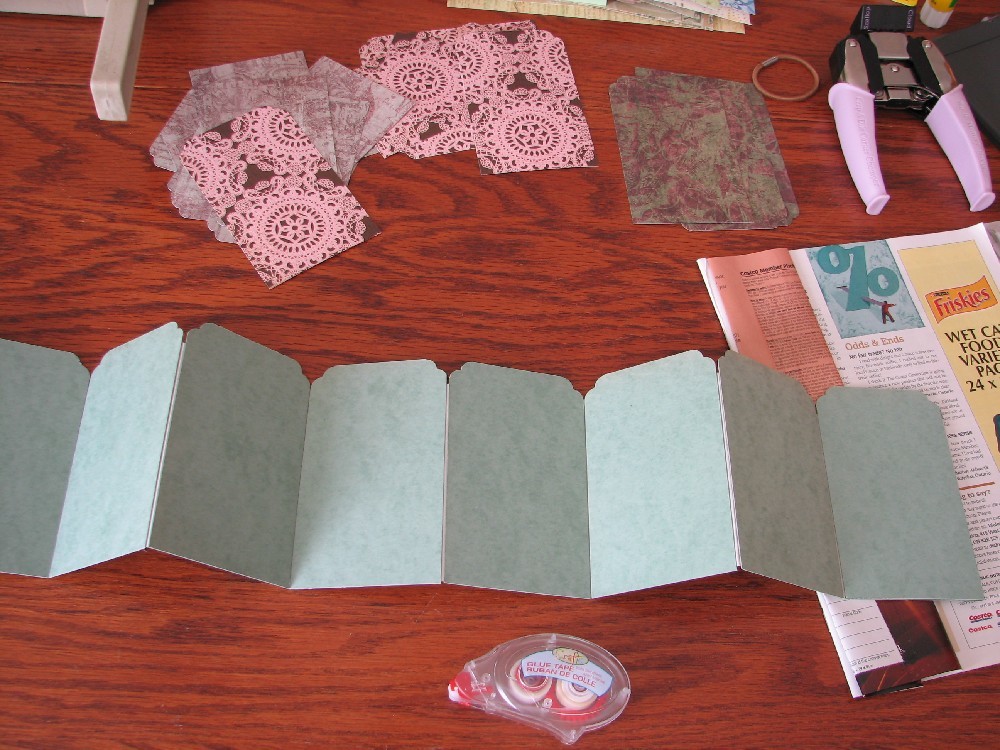
I started with 10 pieces of heavy chipboard. I actually had some nice green file folders that were a very nice weight so I used those instead.
Any type of chip board, or mat board will work fine. The 10 chipboard pieces measure 5 inches x 3 inches.
10 pieces = 20 sides, so then I chose 20 pieces of design papers to cover the board. I chose colors that are complimentary to my home.
These holders can easily be created in other sizes to accommodate different art cards. 
The last item is some 1 inch strips of paper to join the pieces together. They are approx 4.5 inches long and one inch wide. If you take a standard letter page cut it in half the long way and then cut up your strips.
Or use any kind of scrap papers as you like.

Then I cut the top corners of all the pieces with a decorative punch. For those of you that know me, you know that I could be a poster child for Crop-A-Dial punches. Why? because they cut through just about anything. I now have several of their punches in my collection with no intention of stopping this new collection.
My favorite is of course the hole punch/eyelet rivet setter. I punch holes through tin like I am spreading butter with a butter knife. For this project I used the decorative corner chomp punch. What a fabulous tool for creating fancy edge corners and it still amazes me that it cuts through mat board and chipboard with almost no effort.

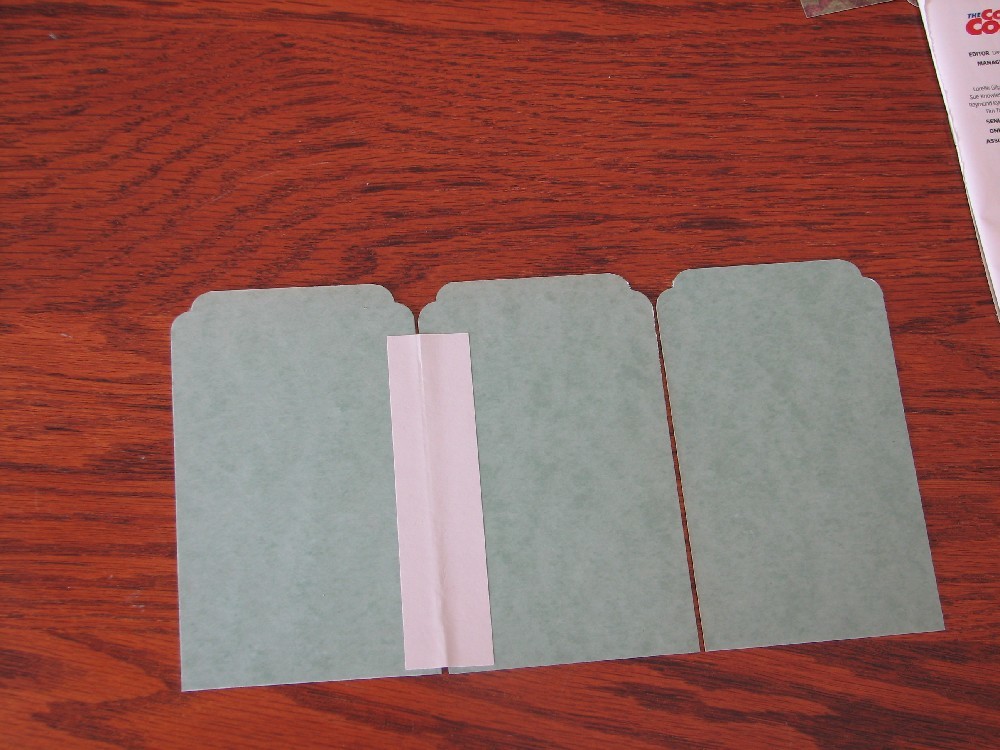
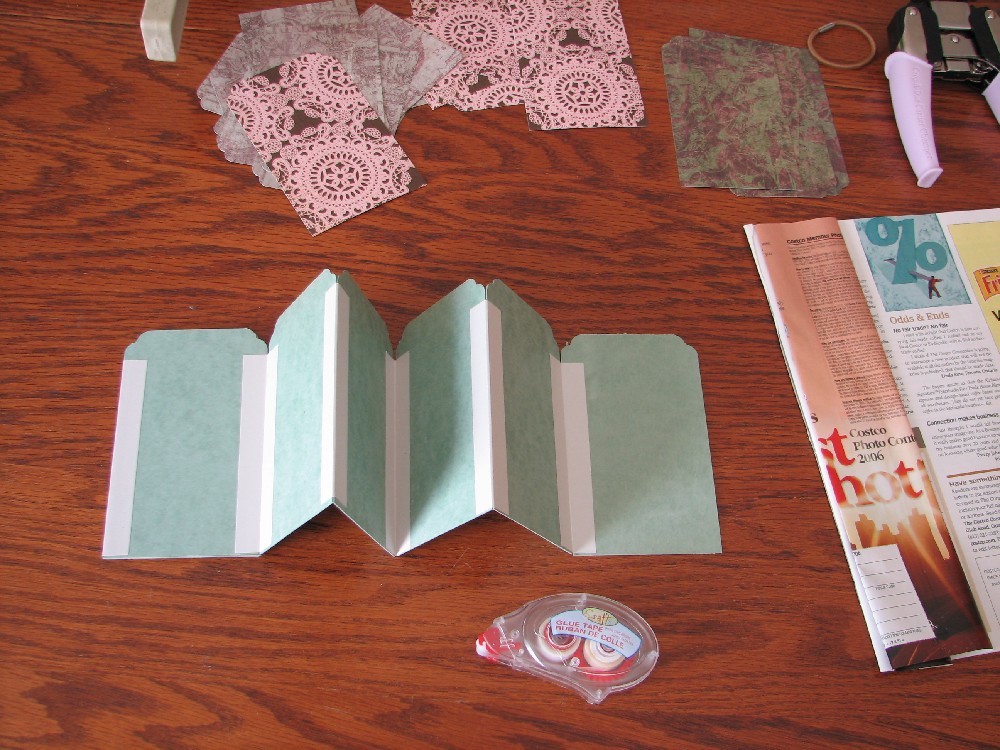
Now using the paper strips I am starting to glue the pieces together to create an accordion style display. 
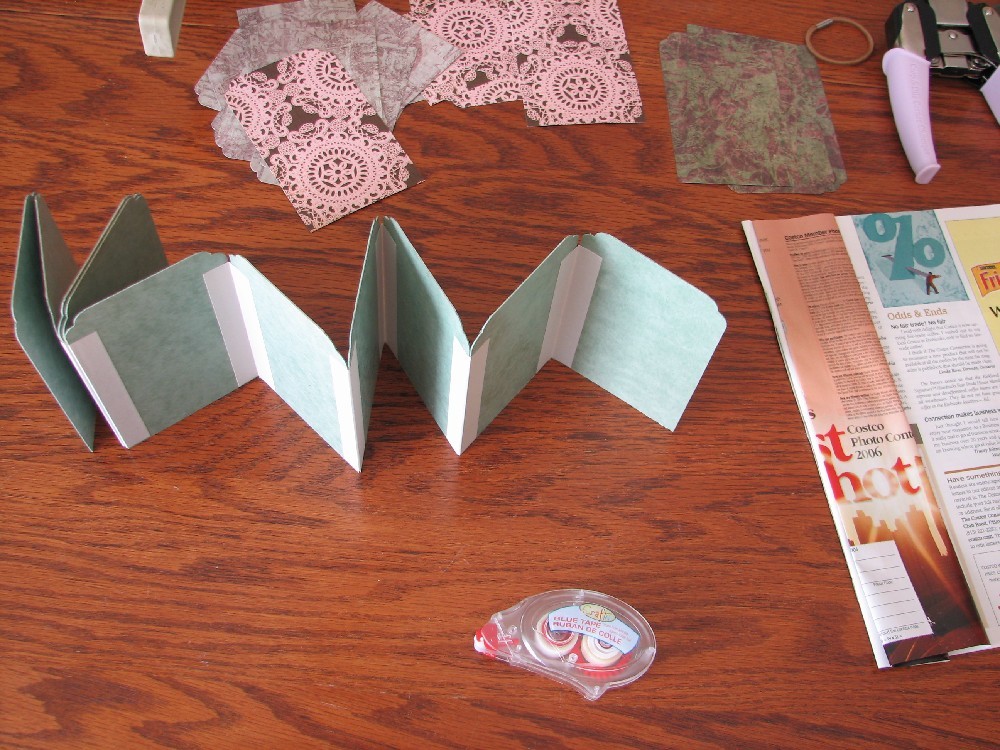
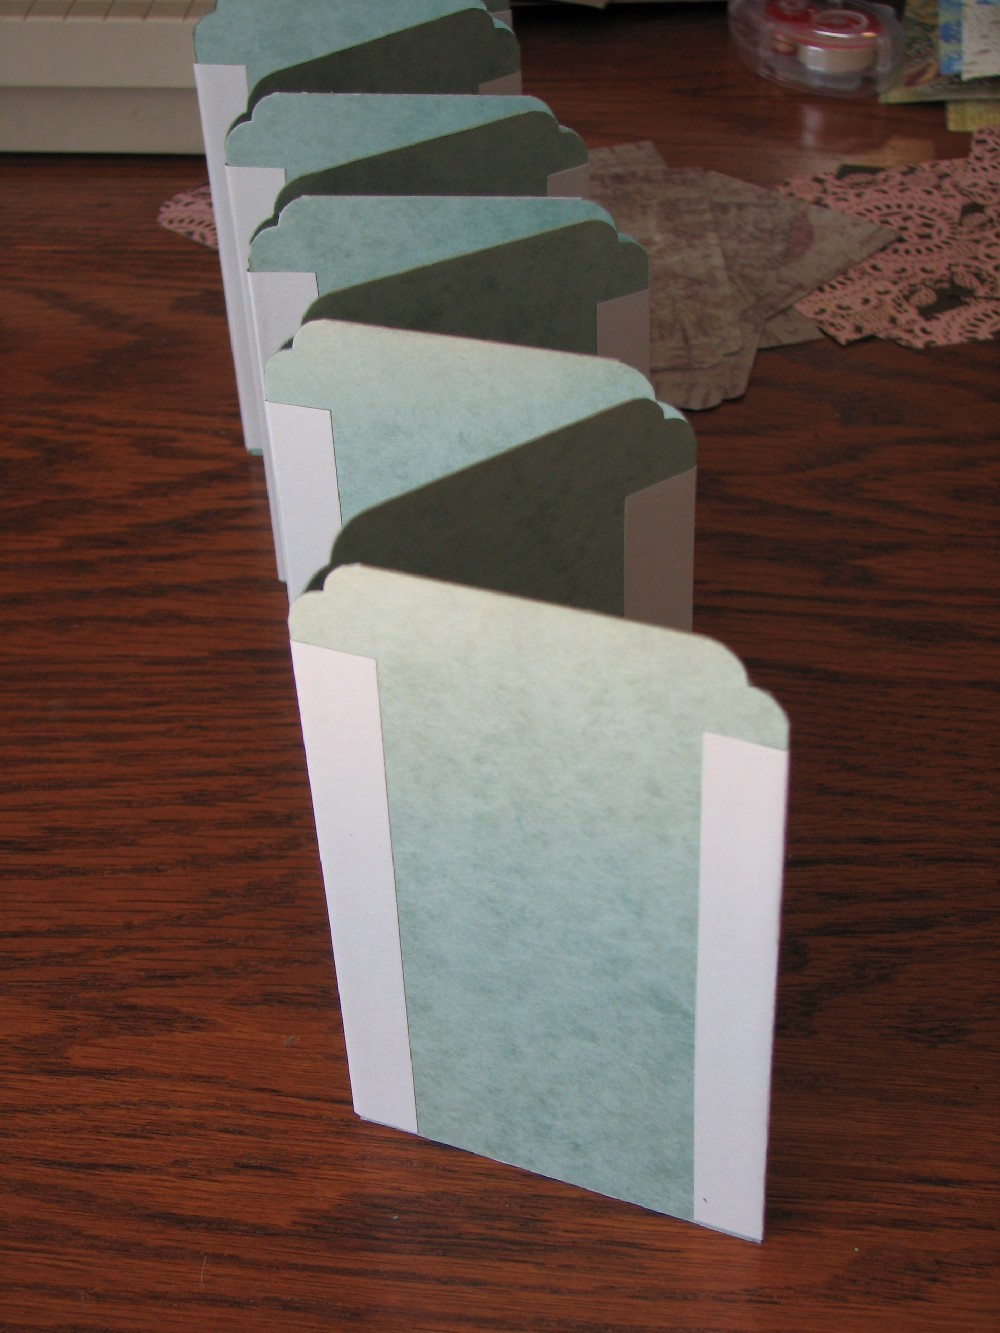
If you look closely at the photos below you can see I am leaving a slight space between each piece as I glue the paper down. Also check each one after you have glued it to be sure it is standing straight and folds nicely against the previous piece. Better to check now than find out later that something is crooked!!!


Now that they are all together, flip it over and do the same to the other side. To glue the paper strips, I used a glue tape from the dollar store. This made this part of the project quick and easy.

I added paper strips on each end piece. Even though it isn't connecting to another, it just gives a little extra stability because the end pieces that will be handled the most.


Using an ink color of your choice, ink stain the edges inside and out of all of the accordion folds. This will insure that the ugly edges will not show.

Next comes the decorative papers. I didn't show a step by step on this part because it is just gluing the pieces over the mat board. Check each piece before gluing, you may have one that doesn't fit perfect and needs a little trimming. I actually cut my pieces a little bit smaller and then ink stained around the edges to cover up any ugly edges showing through. You could also use paints or glitter to cover up any flaws too!

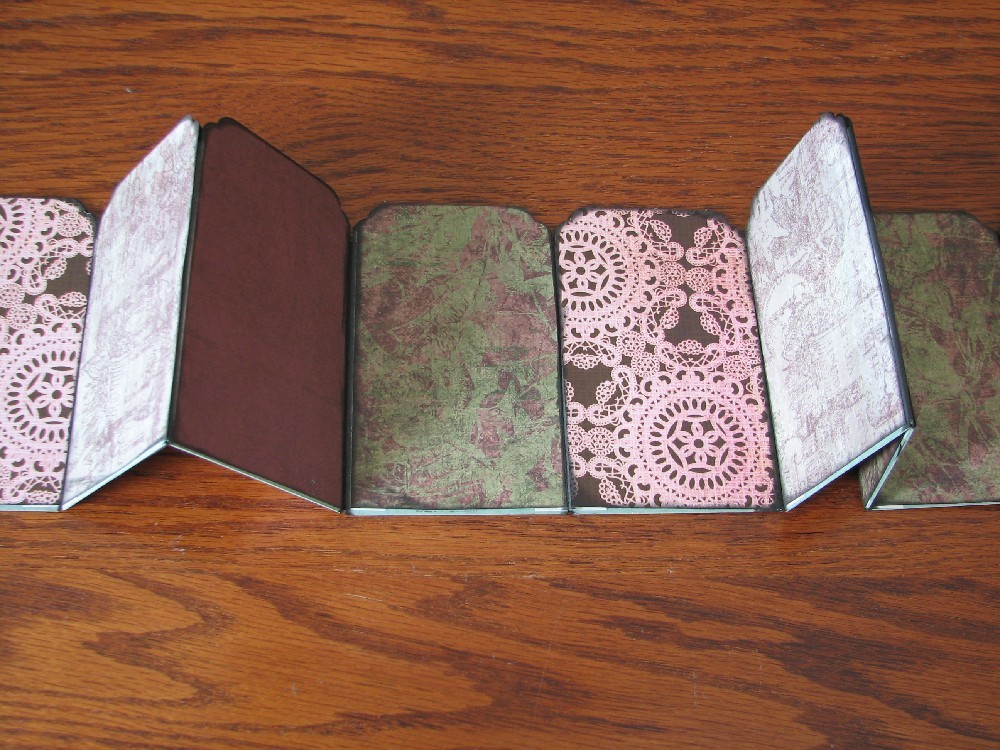
Here we are! Design papers are on! If you noticed, the bottom of each piece still needs to be inked. That's because I am working on my dining table right now and didn't want to clean up ink stains. I will ink all at the end and let it thoroughly dry upside down.

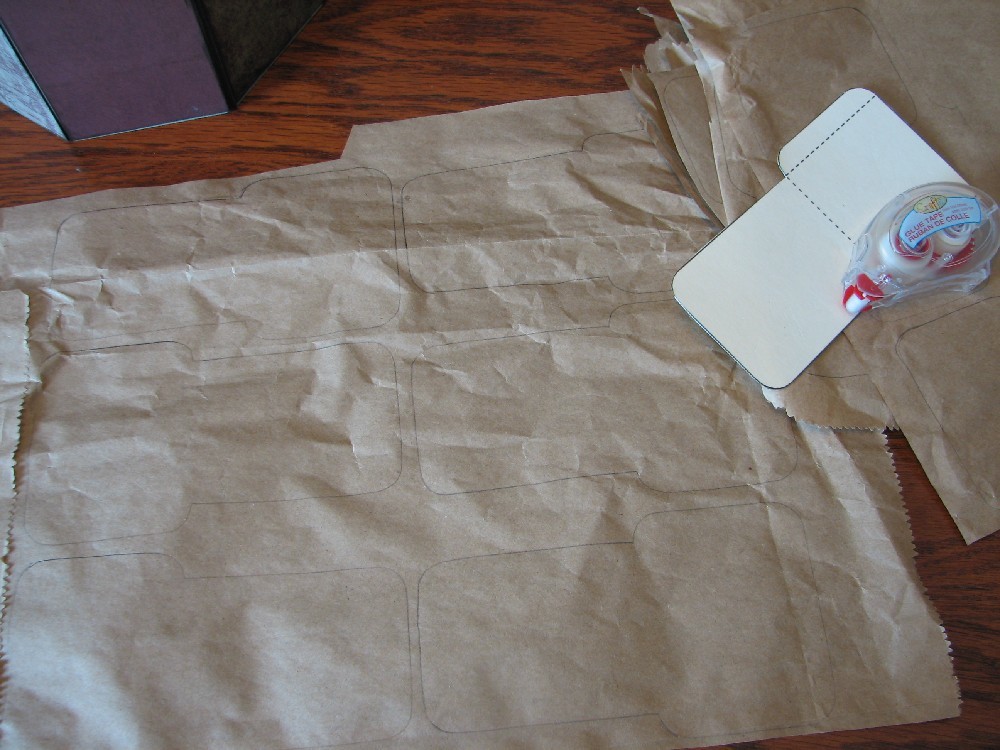
Now for the holder pockets. I printed many copies of the holder template so that I would be able to cut them out and decorate. But the template could also be photo copied and printed onto the back side of decorative papers and then cut out but you would need to use 2 sided paper so you don't have a plain white piece when folded up.
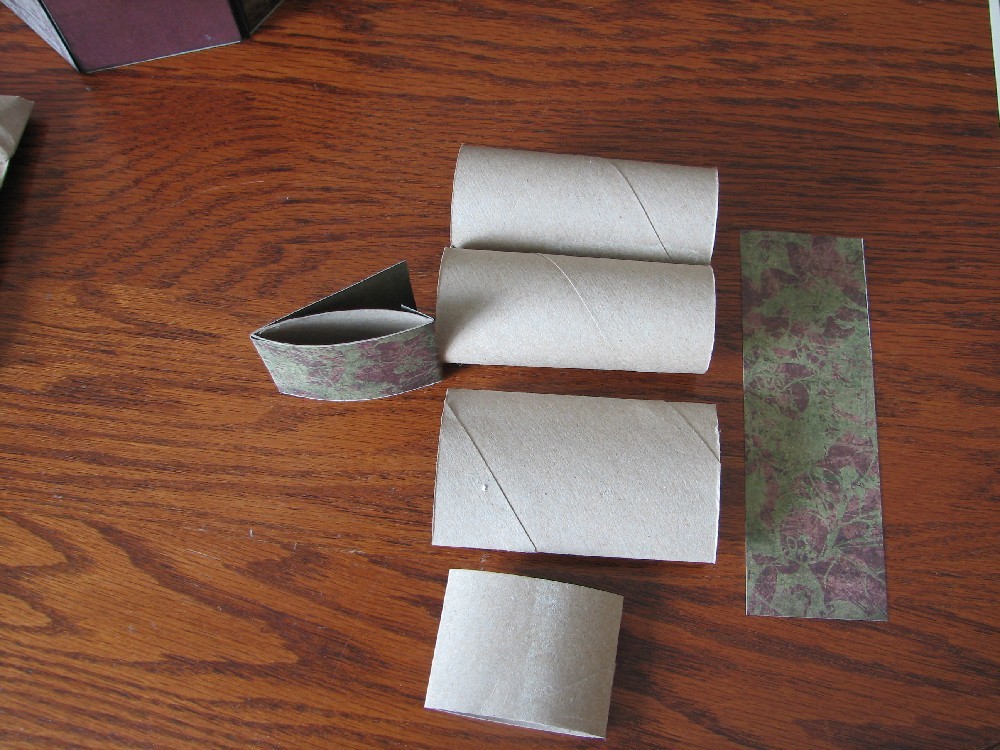
Then I decided instead to use the template as just that, a template and then hand traced onto some brown paper bags. I love to recycle, and brown paper bags love to be inked and painted! It is entirely up to you as to what you make the pockets from. Even toilet paper rolls cut in half are the perfect size for the 2 inch row houses, and coin rollers cut in half are fabulous for the inchie row houses.


I didnt worry about the wrinkles in the brown paper bag, in fact when all were traced, cut out, and inked I then crumpled the papers even more so that the wrinkles would take the stain and distressing.
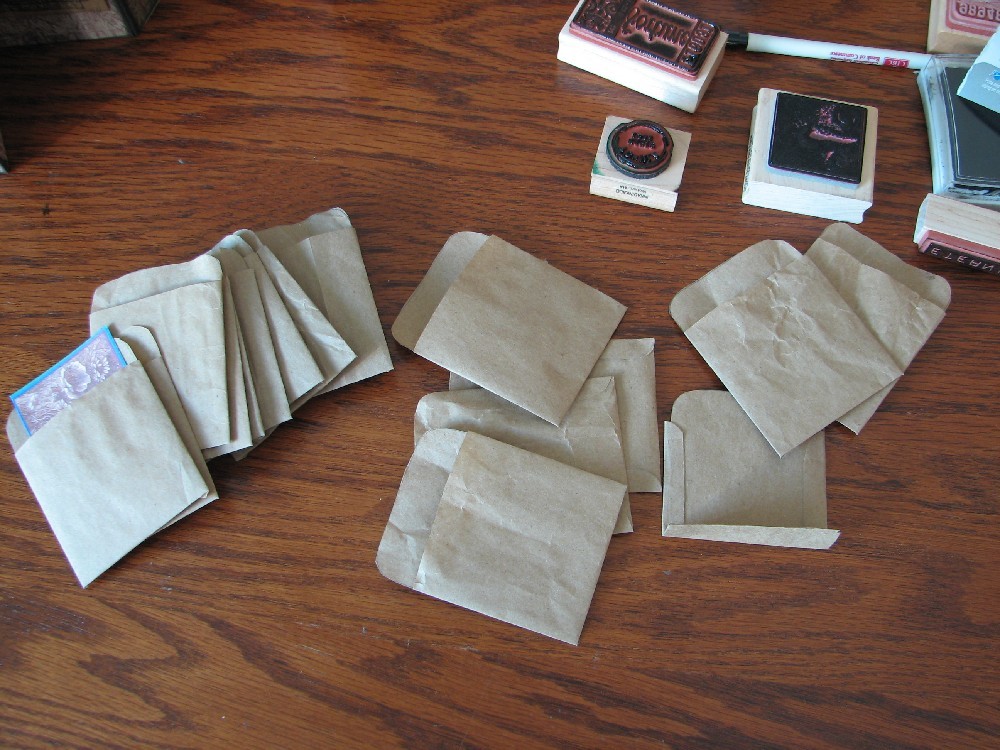
I need 20 pockets (10 for each side). It sounds like alot, but in all it took me about 20 minutes to trace and cut them out. Then I folded and glued the sides.
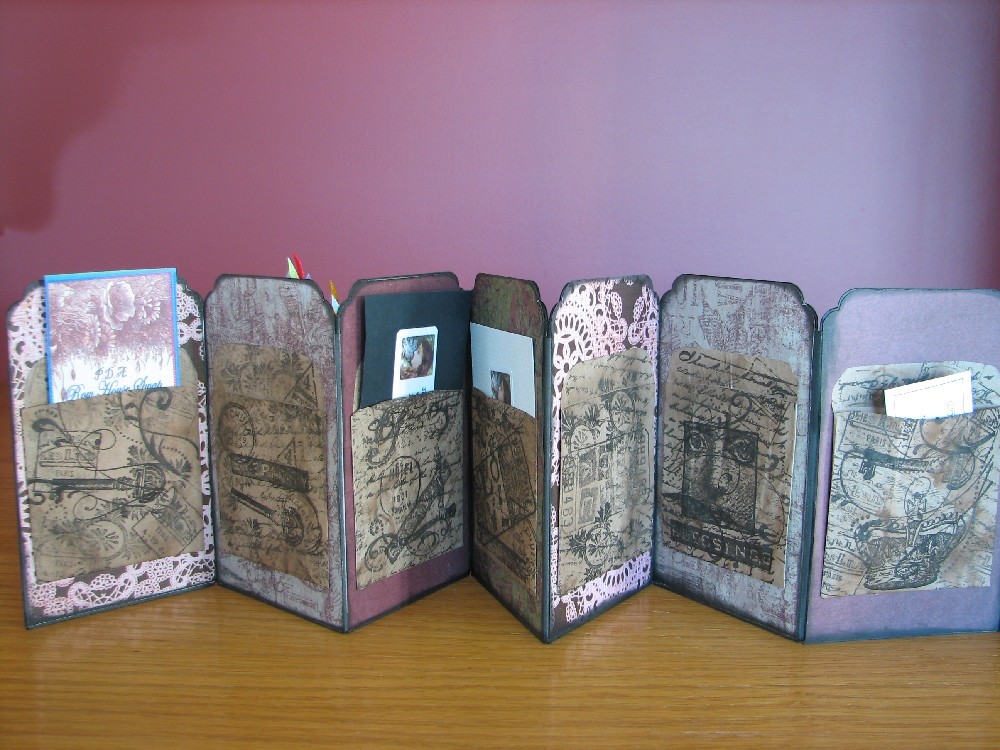
You may notice (soon) in the pics that some pockets are shorter than others. That is because after I folded and glued the pockets I then folded the back up another inch and glued so that I had 10 short ones and ten full size. The 10 short pockets are for the front of the display holder to hold the row house cards, and the 10 full size pockets are for the back side of the display to hold the artist info cards that some artists send with their work as well as little notes and sometimes I receive cute little tags and tidbits from other arists.
At the end you will see the back side of the display. Not all the pockets are used but that is okay. Maybe somehow along the way I could trade for a few more houses?

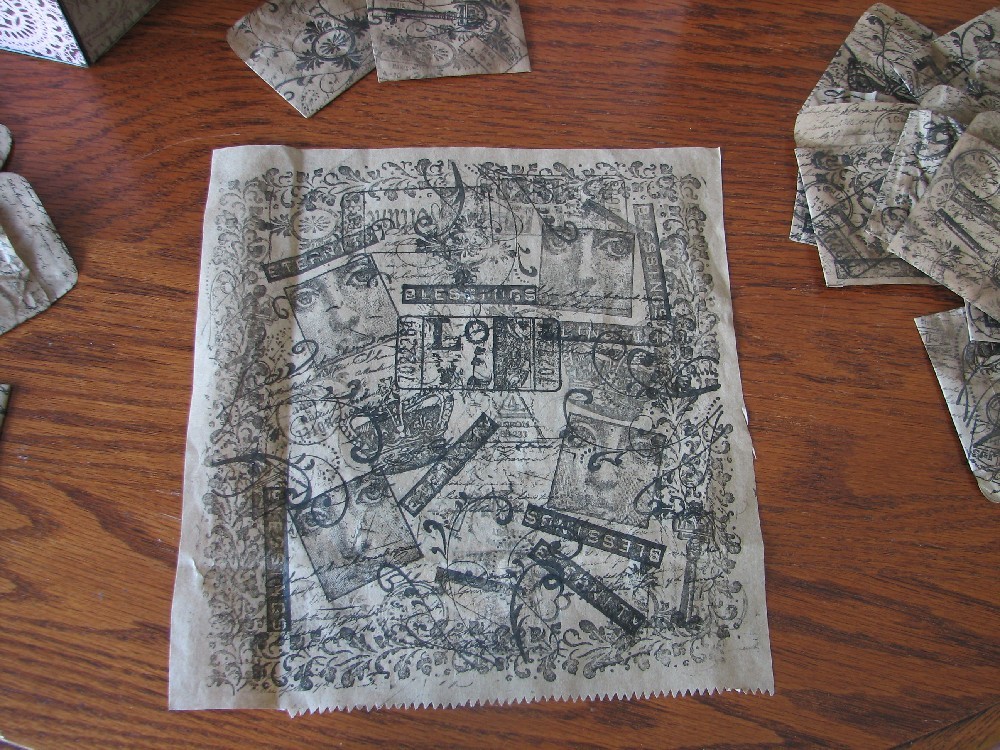
Then I got out the rubber stamps and the ink and became an erratically insane stamper. I have a huge collection of rubber stamps and really don't use them very often. I find that most times I get tired of a stamp after I have used it once or twice but yet the need for more is always there. They do look nice on my shelf!
I really wanted something that looked distressed and chaotic so I just stamped all over the place. When I was done I cleaned my stamps off by stamping on the very paper I used as a work surface. Hmm what to do with this fun piece of paper?
You can see that I crumpled the envelopes more, and then I distressed even further with some brown ink in spots to give an aged burnt look. Again, notice the 2 sizes for front and back of the display.


Next I glued the holders onto the display using a UHU glue stick (sorry but the glue tape doesn't work well for this part of the project)
Below you will see images of the front and back of the display completely finished. Though after reviewing the images I did see a spot that need some inking I had missed. I will still embellish some along the tops of each panel, I just want to think about it for awhile to decide what I want to do.
The pockets still hide the finished art inside. I personally like the touch and feel factor as well as the element of surprise when I take each piece out and look at it again and again.
However, you could also make these pockets from vellum or clear acetate to show off the art even more.


I hope you have enjoyed this tutorial and that I have inspired you in some small way to create your own display holder.
Please do share if you create your own!