
Embellished Altered Keys

Embellished Altered Keys
This Tutorial is about altering ordinary discarded house and car keys
These Embellished Altered Keys are fabulous to use for your scrapbook pages, altered books, collages and mixed media projects.
Lovely embellishments to add on book and journal covers, even as new jewelry pieces!
Dig through your junk drawer, your jewelry boxes and visit your local thrift shops and garage sales for lovely baubles and bits to add to your key creations. This tutorial makes a fabulous workshop or class and a fabulous fun day with the gal pals making these keys.
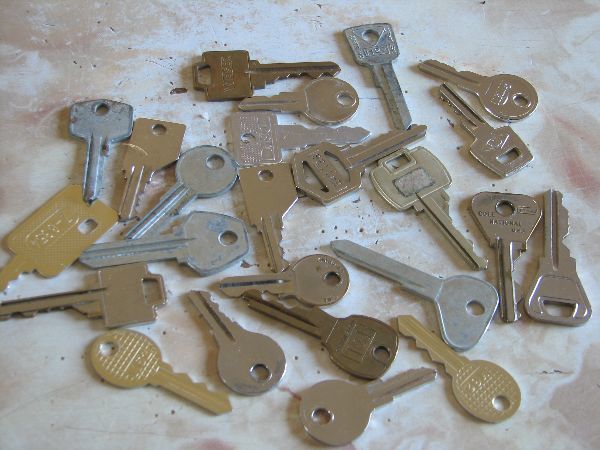
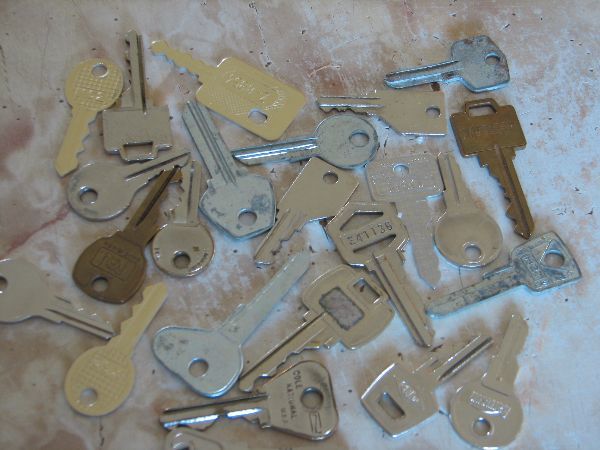
I had been saving this pile of keys for a while now with the idea that someday, somehow, I was going to alter them into something crafty. Well, today was "someday" actually the last couple of days. I was having so much fun I kept making more.
Basic Supplies:
- Black and gold acrylic paints
- water based varnish clear
- sponge brush and paint brush
- wax paper
- Goop glue
- Jewelry making supplies including: jump rings, wire, head pins, eye pins etc.
- Good jewelry needle nose pliers (even 2 pair work well if you have)
- Filigree embellishments all shapes & sizes
- assorted cabochons, buttons, broken jewelry, beads, chain and any other decorations you desire.
Getting Started:
Start with a collection of ugly old car and house keys.
Next get out your black paint, using a sponge brush paint the keys both sides. I set them down on wax paper as I was working on them. Don't be too fussy about making them perfect because the paint doesn't stick perfectly. Besides, you will be adding additional colors that will hide any flaws.
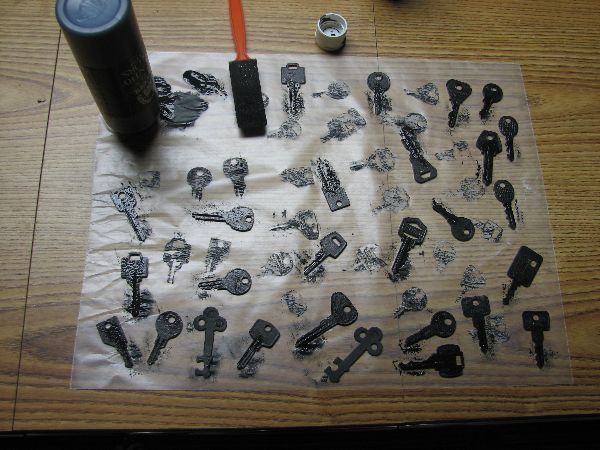
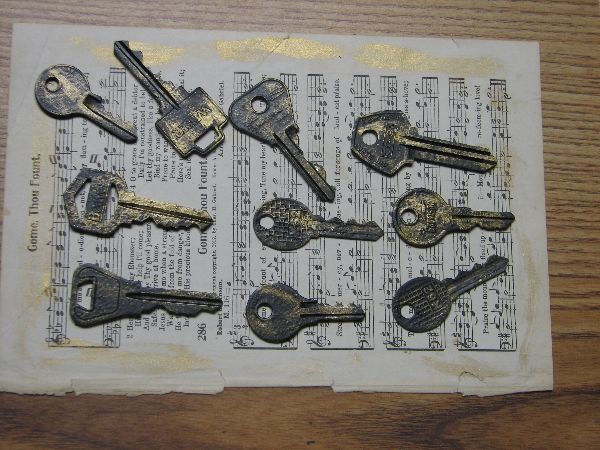
Next, using the gold paint, dry brush very lightly a little bit of gold on each key, allowing lots of the original black paint to show through. This just gives a very vintage look.
Variations: Try painting with patina colors, for an antique copper look, or even rusting your keys for a couple week for a natural weathered look.

Yep, I know, they still look like old house and car keys but they are getting better right?
Now give a very light coat of varnish to protect the paint from chipping.
Now go through your stash of Filigree embellishments to decide which style fits best with each key. Be sure to try them different ways too, I loved the diamond shape when I turned it the other way.
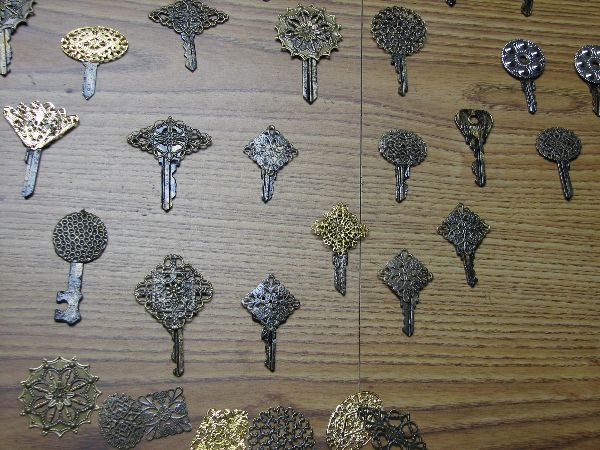
I changed my mind several times before I actually glued them down. Using Goop Glue, glue the filigree pieces to the keys. covering the old key face as you desire.
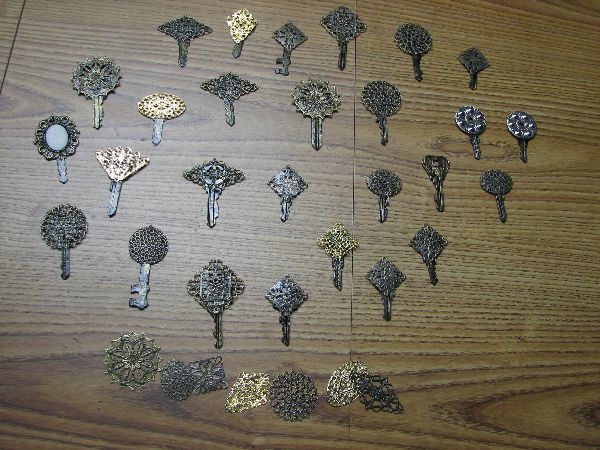
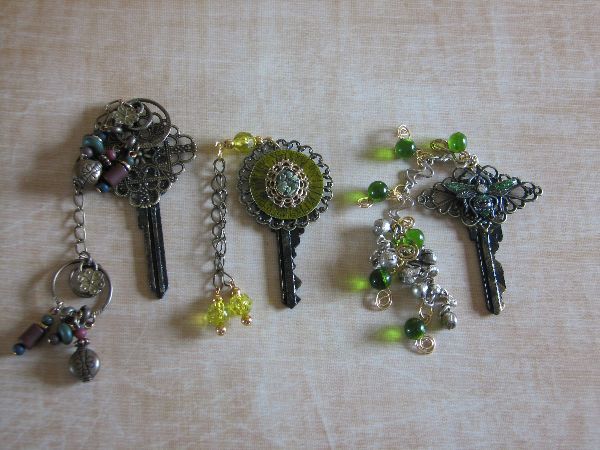
Next is the embellishing of your keys. It is impossible to give you actual instructions because it all depends on how fancy you want to get or what findings are available to you. But if you are resourceful, you will probably have a multitude of great items very close at hand. I used buttons (break off the shanks) odd earrings, cabochons, gems, beads, chain and more.
Be sure to glue these items on using the Goop glue, this way you know they wont fall off.
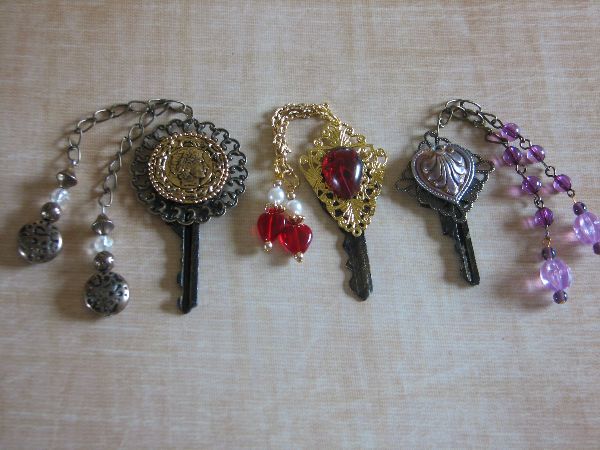
Below are pictures of finished keys that I made. I will describe what I used for each key (I think I actually remember)
Key 1 a pair of earrings, one attached to the key, the other dangles from a chain.
Key 2 A watch face with a cabochon and matching beads dangle from a chain.
Key 3 A butterfly hair barrette with matching beads and chain.
Key 4 a Button and a chain tassle from a necklace.
Key 5 A button, beads and chain
Key 6 Another button (too easy) and more beads and chain
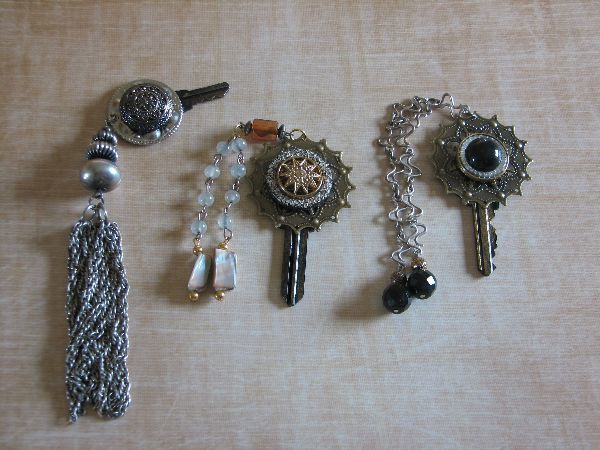
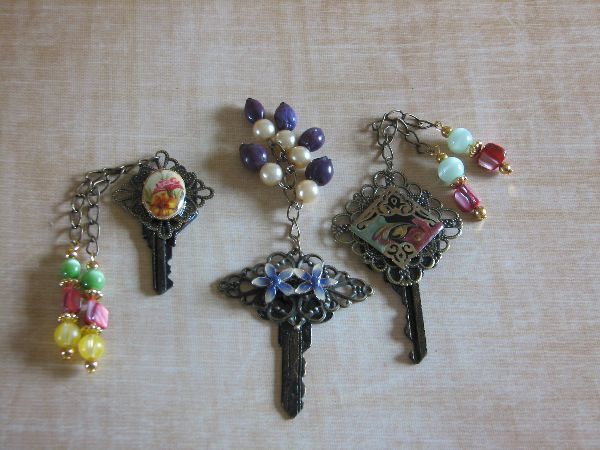
Key 7 Coin trinket with beads and chain
Key 8 Red Glass Gem beads chain
Key 9 Heart shaped earring and more beads and chain
Key 10 Button
Key 11 Pendant with glass bead
Key 12 Button

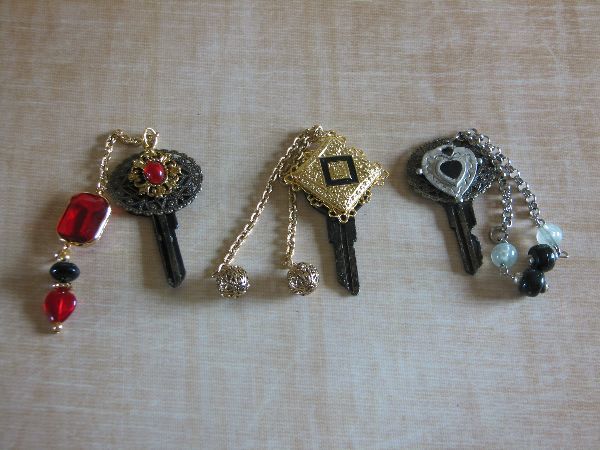
These I used some broken necklaces chain and beads
Key 13 Earring
Key 14 Button
Key 15 Earring

Start asking your friends for all their old jewelery, visit your local thrift shops and garage sales.
Key 16 Cabochon
Key 17 Hair barrette
Key 18 Earring
I really lucked out in my stash of beads to find matching colors, but I do have a huge stash to work with. keep in mind when you are making these keys, what you want to add and match with the embellishments.
Key 19 Button (it actually fit right into the frame)
Key 20 Earring ( I love this green one)
Key 21 Gem ( a plastic dollar store find)

Key 22 Pendant
Key 23 Button
Key 24 Another Earring
So there you have it! Hopefully you will be inspired to create your own embellished keys. Please let me know if you make any yourself, I would love to see your creations.
Kim
No comments:
Post a Comment
Note: Only a member of this blog may post a comment.